Software Engineer

-
Name: Prince
-
Birthday: 28 February 1993
-
Job: Freelancer
-
Email: i@princejoal.com
-
Skype: 1081a1d198d8081c


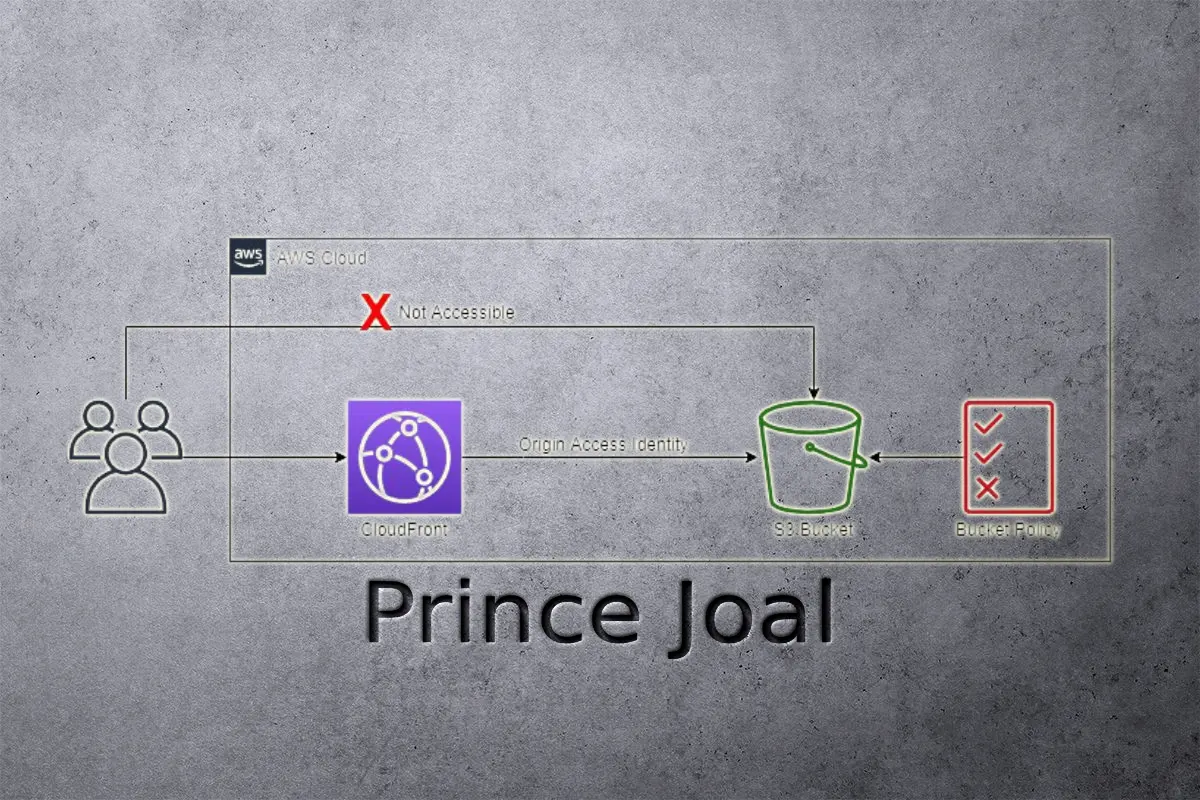
Most websites or web applications use S3 buckets and Cloudfront to host static content like CSS files, Javascript files, images, and many more. Today’s tutorial is all about storing your objects (data files) in an s3 bucket and how to secure your bucket using CloudFront. OAI (Origin access identities) The main advantage of using OAI is that it allows you to secure your S3 bucket without creating a separate IAM user and policy just for the purpose of securing your S3 bucket / restrict access to an Amazon S3 bucket using CloudFront OAI.
Why do we need to use restrict access with OAI?
if you are using an Amazon S3 bucket, you can either allow access to everyone or only restrict access to protect against various types of attacks. As you know, Amazon’s services cost based on their usage. Some people use your assets. If you do not restrict your bucket to allow public access, then it would be costing you money and you would not be getting paid for those costs.
Creating s3 bucket For restrict access with OAI
1: Sign in to the AWS console

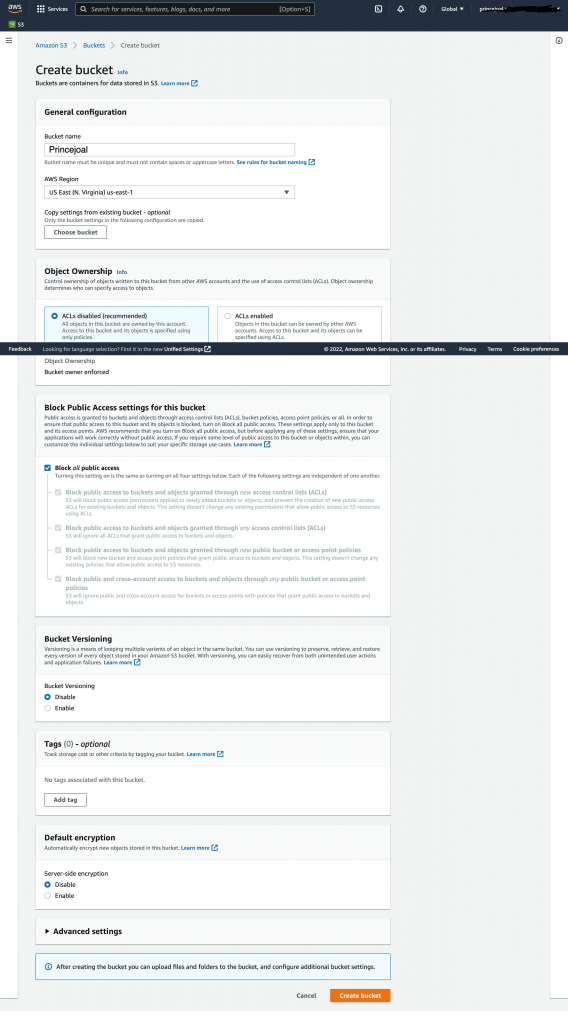
2. Create a new s3 bucket
3: Create a Cloudfront distribution
– Origin access identities only apply when using the S3 REST endpoint for the bucket (example-bucket.s3.amazonaws.com), not when using the endpoint for hosting websites (example-bucket.s3-website.us-east- 2.amazonaws.com), because those endpoints only support requests that are for public content and do not support authenticated requests, whereas OAI is an authentication mechanism restrict access to an Amazon S3 bucket using CloudFront OAI.
– These settings are not accessible when using the website endpoint because CloudFront treats the origin as a Custom Origin rather than S3 Origin, and even if they were, they wouldn’t function.
-Origin domain->Select your s3 bucket which you want to resitrct with OAI

5: Under S3 bucket access
– (Mark): Yes, use OAI (bucket can restrict access to only CloudFront)
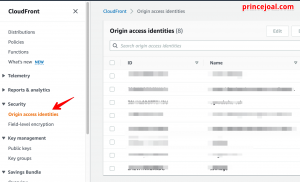
– Create new Origin access identity or use existing OAI (Look in your Clodfront left menu panel if you can’t locate your current OAI there.
security->Origin access identities).
Existing OAI (Origin access identities)
– Bucket policy -> click ( Yes, update the bucket policy ) it auto-generates bucket policy
6: S3 Bucket Policy
After Creating Distribution Go to your s3 bucket and review the bucket policy under the Permission tab. If it exists, then your bucket will be secure. Other than that, in the Bucket policy editor, confirm that there is a statement similar to the following: change EHGYFNMOXKDG with your OAI ID and change arn: aws: s3:: bucket ARN/* to your bucket arn
{
    "Version": "2008-10-17",
    "Id": "PolicyForCloudFrontPrivateContent",
    "Statement": [
        {
            "Sid": "1",
            "Effect": "Allow",
            "Principal": {
                "AWS": "arn:aws:iam::cloudfront:user/CloudFront Origin Access Identity EHGYFNMOXKDG"
            },
            "Action": "s3:GetObject",
            "Resource": "arn:aws:s3:::Bucket ARN/*"
        }
    ]
}
This is the statement that CloudFront adds to our bucket policy when we select Yes, Update Bucket Policy as part of the OAI setup.
Select the S3 Bucket Object tab. then upload sample picture or any other asset for test OAI Restrict
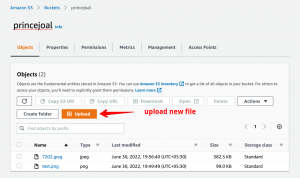
After uploading, choose an item and copy its link from s3 bucket.

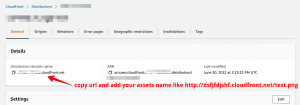
copy link from cloudfront distribution
Following the execution of both links, only the Cloudfront link will be functional, with the other link displaying an access error. You may simply prevent unauthorised attacks on your assets by utilising this Cloudfront OAI.
As I previously said, this is only possible for S3 assets. For static webhosting, you may restrict using a presigned cookie url using cloudfront or cors configuration which is in s3 bucket , which we will discuss in the next tutorial.
I believe this post covered how to restrict access to an Amazon S3 bucket using CloudFront OAI.
Please leave a comment if you have any questions or if you’d want a new tutorial.
I hope you find the above information useful.
Detailed and informative. Great Content.
Well explained !!