Software Engineer

-
Name: Prince
-
Birthday: 28 February 1993
-
Job: Freelancer
-
Email: i@princejoal.com
-
Skype: 1081a1d198d8081c


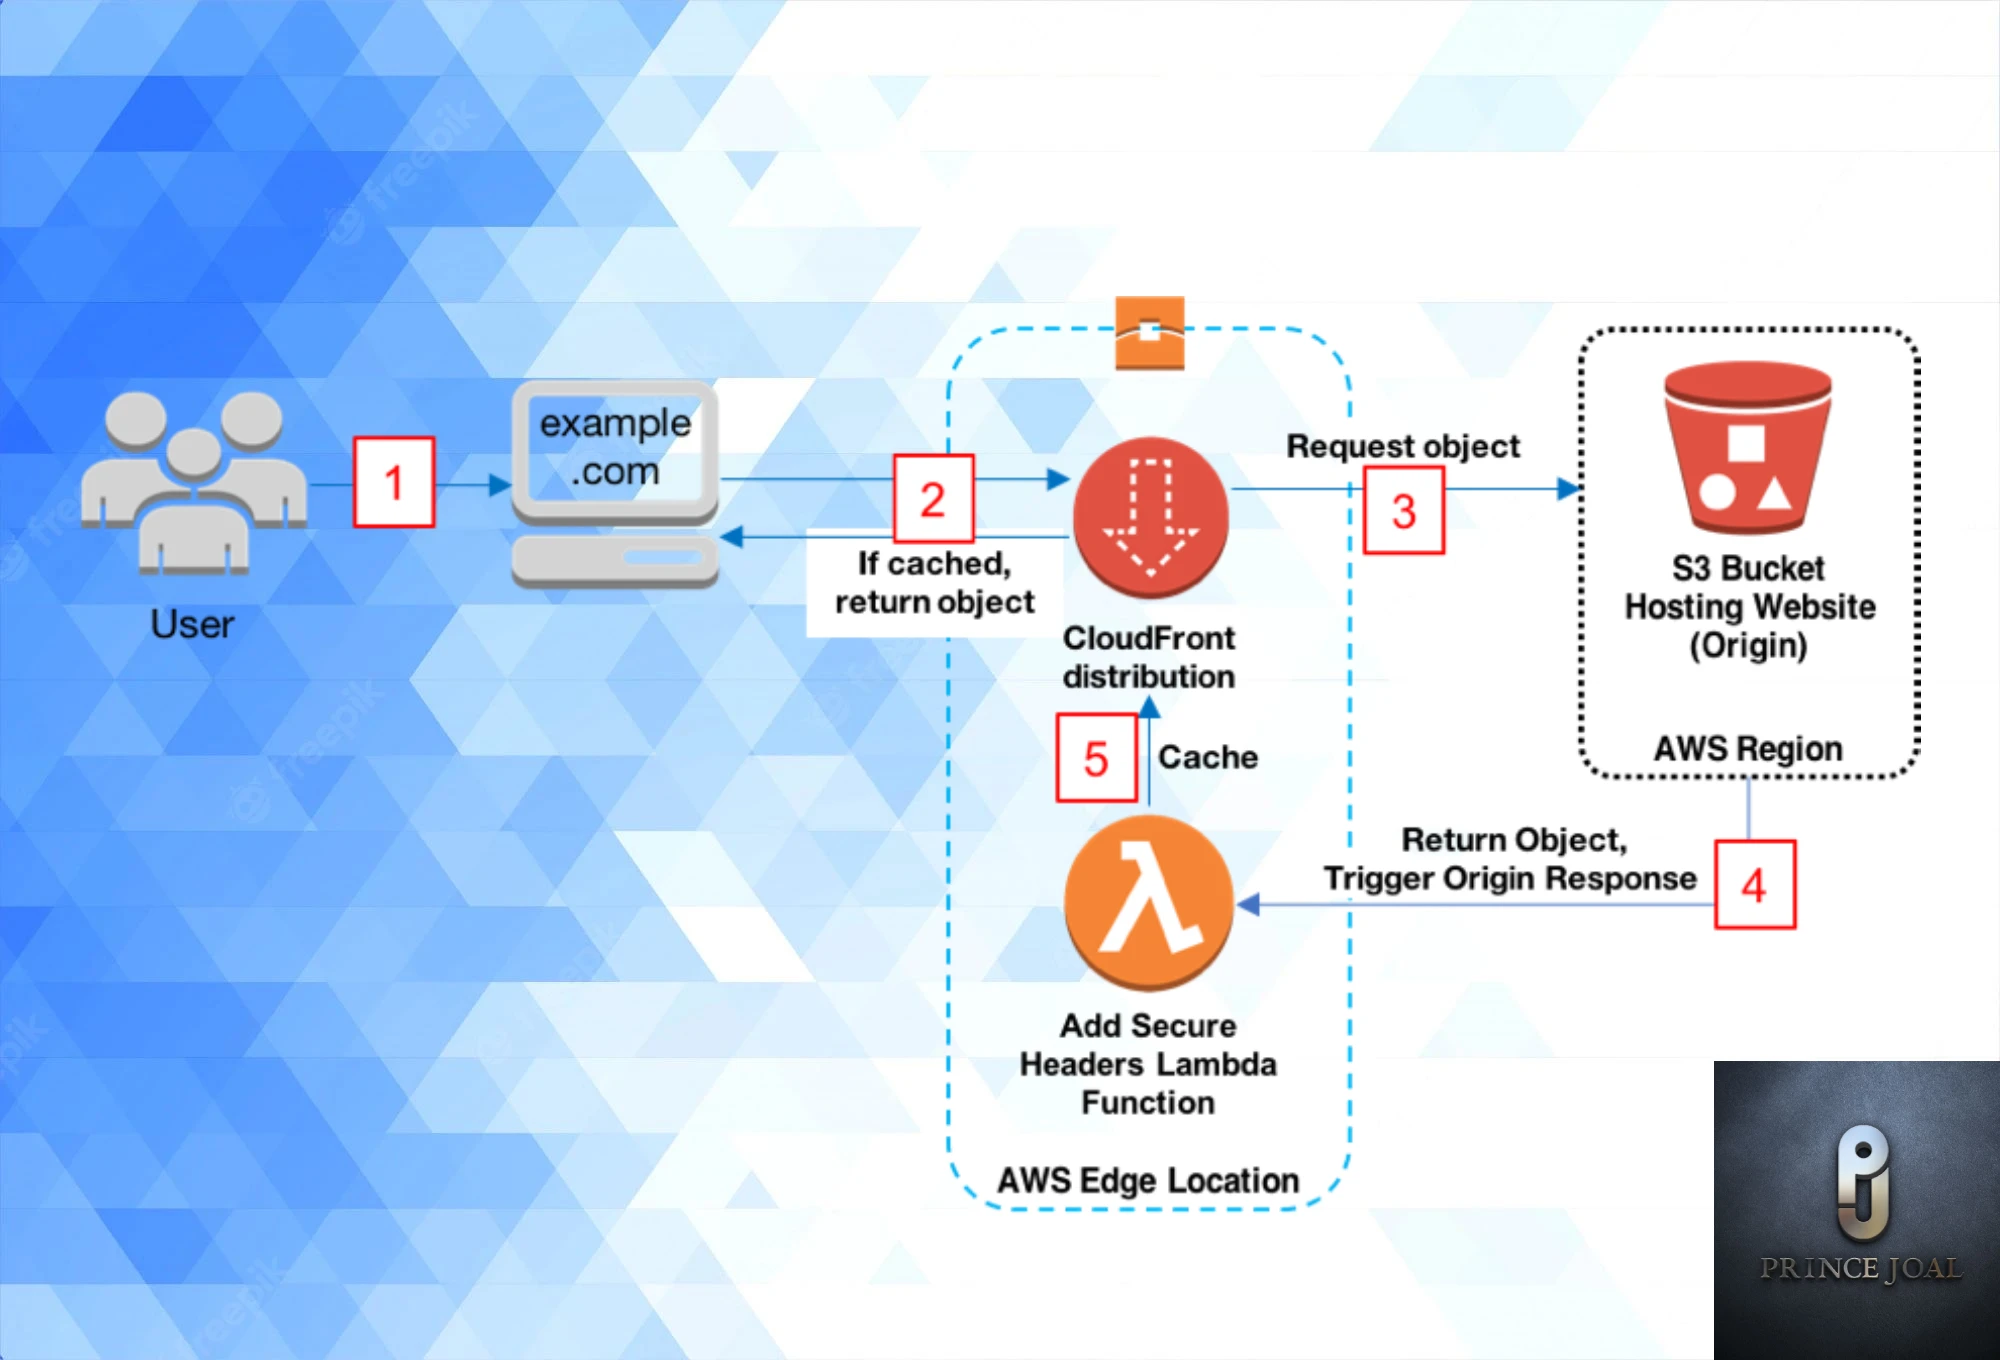
When you request a website from a web server, the server replies with the content (e.g., HTML or an image) and numerous HTTP headers. The response’s content type and the web server’s version are both listed in these headers, for example. The HTTP Security Headers are a special kind of header that is appended to the web server’s response to impose a specified set of security rules on the client’s browser.In this post, we will discuss how to inject your security headers with your static website hosted on an s3 bucket using lambda function and cloudfront.
The setup of security headers is a critical step in protecting your web application Security Headers With Your Static Website Hosted On An S3 Bucket against certain sorts of attacks and reducing the attack surface of your application. The right setting of HTTP Security Headers, for example, may successfully combat Click-Jacking, Cross-Site Scripting attacks, Cross-Site Request Forgery (CSRF), and many more.
How to setup an s3 bucket for hosting and how to add security headers using lambda function
In our earlier blog, I already explained how to create static hosting with s3 with or without cloudfront.
![]()
Why do we need this? S3 hosting is different than other platforms. We are not able to use direct htaccess or any other virtual host file for header configuration or any other server type configuration. So we need to use the lambda function to archive this. In the next step, I will tell you how to do this
Let’s start by creating a lambda function for header security and adding s3 bucket hosting and cloudfront
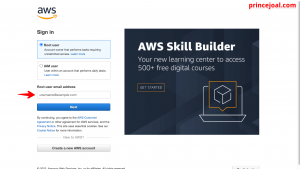
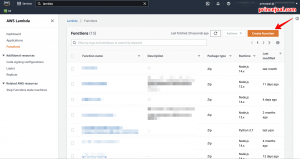
1.Go to AWS Console and open AWS Lambda
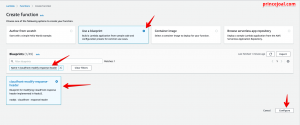
2.Create function -> use a blueprint -> in search find “cloudfront-modify-response-header”
3.Add the function name; create a new role or existing role for the execution role, enter the role name, then create the function.
4. After then, it took on the appearance of a referred image sort of console.
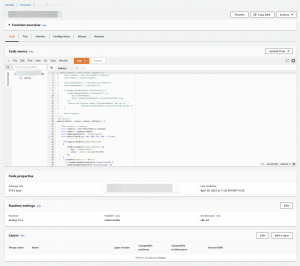
5.After that, paste the code, which is
'use strict';
exports.handler = (event, context, callback) => {
//Get contents of response
const response = event.Records[0].cf.response;
const headers = response.headers;
const headerCacheControl = 'Cache-Control';
const defaultTimeToLive = 60 * 60 * 24 * 30; // 30 days
if(!response.headers['cache-control'])
{
response.headers['cache-control'] = [{
key: 'Cache-Control',
value: `public, max-age=31622400`
}];
}
if (response.status === '200') {
if (!headers[headerCacheControl.toLowerCase()]) {
headers[headerCacheControl.toLowerCase()] = [{
key: headerCacheControl,
value: `public, max-age=31622400`,
}];
}
}
//Set new headers
headers['strict-transport-security'] = [{key: `Strict-Transport-Security`, value: `max-age=31536000; includeSubdomains; preload`}];
headers['Permissions-Policy'] = [{key: 'Permissions-Policy', value: 'interest-cohort=()'}];
headers['x-content-type-options'] = [{key: 'X-Content-Type-Options', value: 'nosniff'}];
headers['x-frame-options'] = [{key: 'X-Frame-Options', value: 'sameorigin'}];
headers['x-xss-protection'] = [{key: 'X-XSS-Protection', value: '1; mode=block'}];
headers['referrer-policy'] = [{key: 'Referrer-Policy', value: 'same-origin'}];
headers['content-security-policy'] = [{key: 'Content-Security-Policy', value: " base-uri 'none'; form-action 'self'; block-all-mixed-content"}];
//Return modified response
callback (null, response);
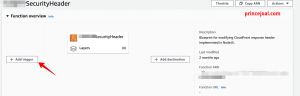
};6. after published add a trigger -> in trigger configuration search “cloudfront”, click deploy to lambda@edge
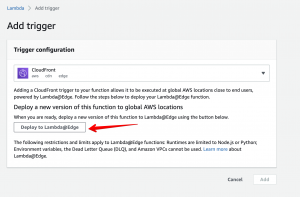
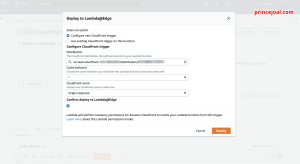
7. configurate new cloudfront trigger or choose existing one
- select distibution
- select cache behavoir
- select origin responce
- select “include body”
- select mark tick ” confirm deploy to lambda@edge”
- deploy it
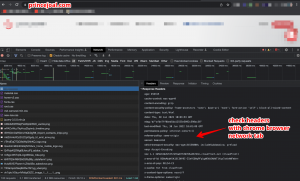
8. After that, you can check security headers added to your s3 bucket
– headers are injected with your request response, which is accomplished with the help of the lambda function.
I believe this post covered how to restrict access to an Amazon S3 bucket using CloudFront OAI.
Please leave a comment if you have any questions or if you’d like a new tutorial.
official tutorial for using aws lambda with cloudfront lambda@edge
I hope you find the above information useful.